
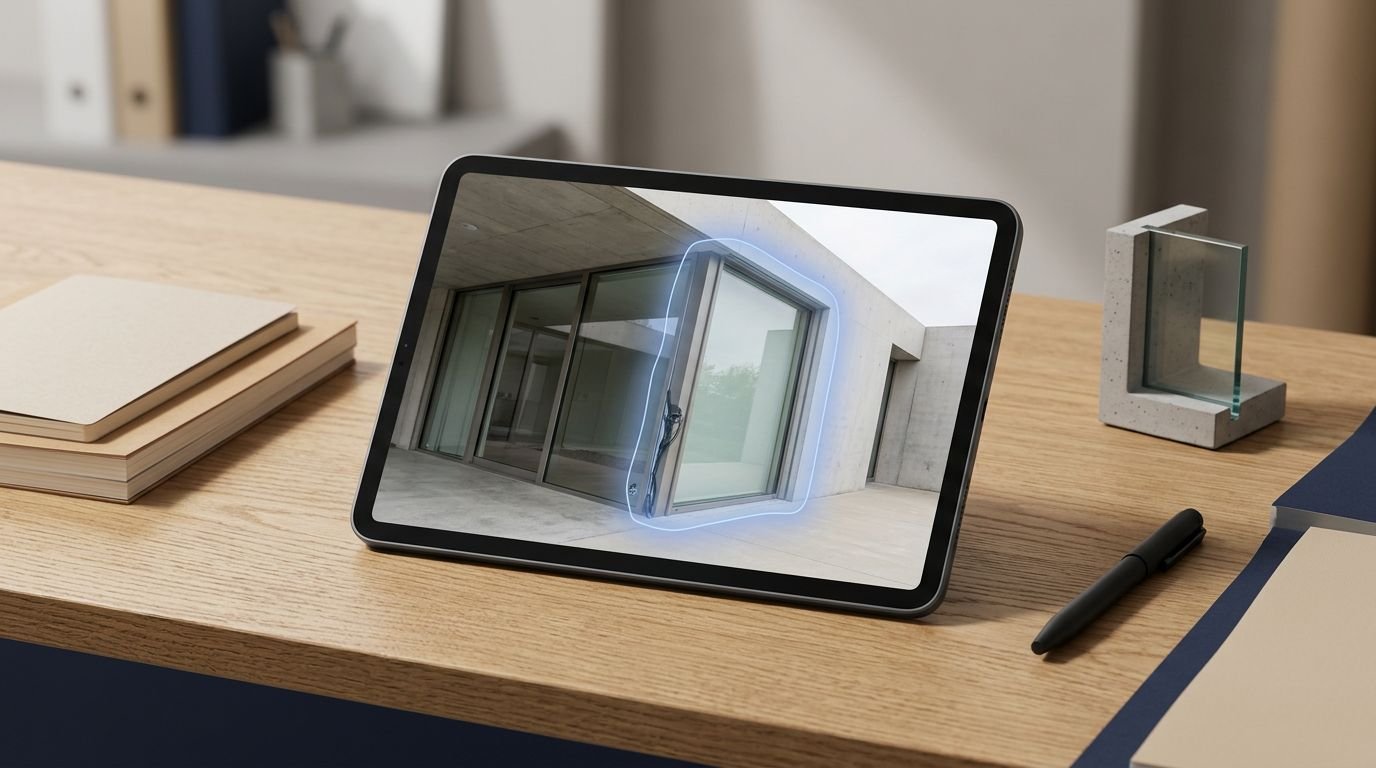
Object removal can rescue an otherwise usable image when a cable, logo, or passerby distracts from the scene. With inpainting prompts, you can remove that distraction while preserving believable lighting, materials, and geometry.
The prompt alone won’t carry the edit. Your mask image limits where diffusion models may change pixels, while your words describe the background the model must rebuild. Start by treating the edit as a reconstruction task, not a delete command.
Key Takeaways
- Treat object removal as a reconstruction task: the mask defines where pixels may change, while the prompt describes the background that should replace the unwanted object.
- Mask the full object, including nearby shadows and reflections, with a narrow margin to help the model rebuild edges, texture, and contact details.
- Keep positive prompts focused on the hidden surface, material, pattern, lighting, perspective, and depth; use targeted negative prompts to discourage visible remnants.
- Tune mask blur, denoising strength, and guidance scale together, and compare results with a fixed seed before changing multiple settings.
- Save complete, reusable recipes with the source image, mask, prompts, model, seed, dimensions, settings, and result so successful repairs can be reproduced.
Start With a Mask That Protects the Scene
Your mask and prompt work as a pair. During object removal, a careless mask or prompt can make the repaired area look pasted in.
Mask the object and its immediate evidence
In most stable diffusion inpainting tools, white areas of the mask are regenerated and black areas remain untouched. The Diffusers inpainting documentation follows that convention. The mask image is the editable input, showing the model where it may redraw the scene.
Cover the full object, then add a narrow margin to the mask image. This gives the model room to rebuild contact shadows, reflections, occluded grout lines, and nearby background texture. A mask that cuts through a bicycle wheel or a person’s sleeve often leaves a visible edge.
Include shadows and reflections that belong directly to the object, or the edit may leave a ghost behind.
Describe the surface behind the object
Don’t spend your positive prompt describing the object you want gone. Instead, state what should appear in its place.
Use the prompt to name the material, pattern, direction, lighting, perspective, and depth behind the masked area. If a wall has uneven brickwork, mention the mortar joints. If a person blocks a tiled floor, mention the tile size, grout lines, and camera angle.
Write Inpainting Prompts That Respect Context
Good prompts read like concise instructions for rebuilding a small part of a photograph. For object removal, describe the hidden background instead of the object being removed. Diffusion models need visual constraints without reinventing the entire frame.
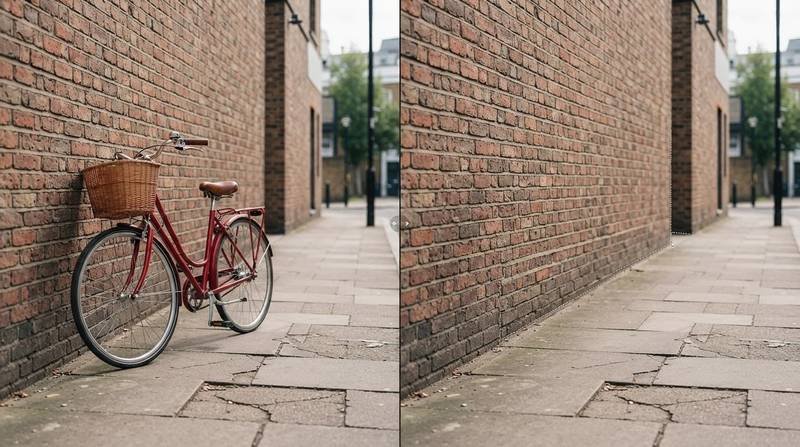
Put the background description first
For a bicycle beside a wall, use a prompt such as:
The mask image supplies the spatial boundary, while the prompt describes what should fill it:
“Continue the weathered red-brick wall and gray concrete sidewalk through the masked area, matching straight mortar joints, low afternoon side light, eye-level perspective, and a faint wall shadow.”
The clip text encoder interprets concrete terms such as mortar joints, tile size, and camera angle. These details give the repair clearer visual rules.
This prompt works because it identifies the missing surfaces and their visual rules. It tells the model to continue existing lines instead of adding a generic patch of brick.
Keep the wider image description short. The surrounding pixels already provide most of the context. Your prompt should focus on the hidden area.
Use a negative prompt to block remnants
A negative prompt can use classifier-free guidance to discourage remnants without dictating the whole repair. For the same edit, try:
“bicycle, wheels, handlebars, person, duplicate object, warped brickwork, text”
Keep the list targeted. A long list of unrelated defects can pull attention away from the repair. If your tool supports prompt weighting, emphasize only a stubborn issue, such as warped masonry or extra wheels.
Decide Whether You Need Removal, Replacement, or Restoration
Each edit needs a different prompt: object removal asks the model to continue the scene, replacement introduces a new subject, and restoration repairs damage while preserving the original image. Context-aware image inpainting uses surrounding pixels and scene structure, so task prompts should target the edit rather than broad image generation. Diffusion models can introduce new pixels for replacements, but restoration should remain conservative.
| Edit goal | Positive prompt focus | Mask approach |
|---|---|---|
| Object removal | Describe the exposed background, texture, and scene continuity | Cover the object and a thin surrounding ring |
| Object replacement | Describe the new subject, placement, and boundary | Cover the old item and the intended footprint |
| Damage restoration | Describe missing material, texture, and repeating pattern | Cover scratches, tears, or corrupted pixels only |
For object removal, describe the exposed background and its texture so the model continues the scene naturally.
Treat replacements as new subjects
With text-guided object inpainting, describe the replacement as a new subject. If its silhouette, footprint, or mounting geometry matters, shape-guided object inpainting can help define those boundaries. If you replace a broken wall lamp, define its size, mounting point, material, light direction, and cast shadow. “Small brass wall sconce centered on the existing mounting plate, warm reflected light on the plaster wall” gives the model a clear job.
For image restoration, stay closer to the original. A prompt such as “restore continuous oak grain and satin finish, matching the adjacent panel” preserves texture without adding a new design.
Tune Mask Blur, Strength, and Guidance
Prompt quality matters, but settings decide how far the model can alter the masked area. Treat them as controls, not universal defaults.
Blend edges with controlled mask blur
In AUTOMATIC1111, the edge-softening control blends preserved and regenerated pixels. For a typical web-sized image, set mask blur around 4 to 12 pixels. Increase it as spatial dimensions and resolution rise.
Too little mask blur can leave a hard cutout edge. Too much allows changes to spill into skin, clothing, or nearby architecture. In AUTOMATIC1111, padding mask crop can also give the model a tighter working crop around the edit.
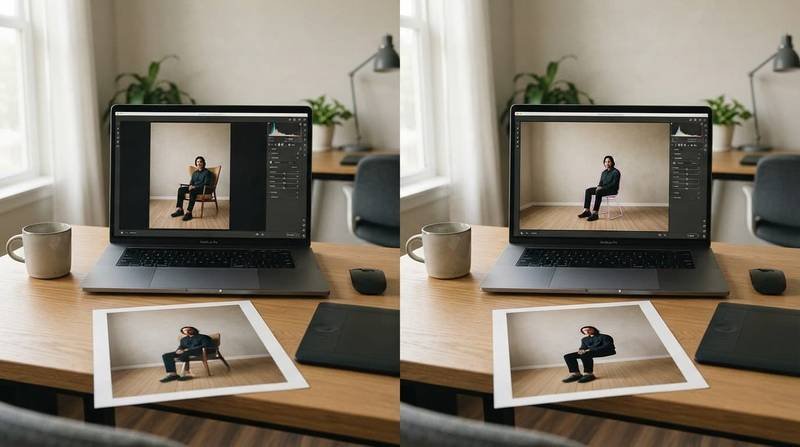
Balance denoising strength and guidance scale
In stable diffusion inpainting, denoising strength determines how much source information survives the denoising process. For ordinary object removal, start near 0.35 to 0.55.
Raise it when the hidden background needs major reconstruction. This can help when object removal covers complex texture, but expect more variation in texture and edges.
A guidance scale around 4 to 7 is a practical starting range. It controls classifier-free guidance, which pushes the result toward the prompt.
At a higher guidance scale, classifier-free guidance can overconstrain the edit, creating brittle surfaces or repeated detail. Prompt weighting can make a small emphasis adjustment, but it won’t replace a better mask.
The masked-content choice also changes how the mask image initializes the edit. Original can preserve nearby visual information, but it may retain traces of the removed item. Fill gives the model a neutral starting area. Latent noise encourages a fuller rebuild and suits large replacements, although it increases the risk of mismatched lighting.
After a high-resolution upscale, use ControlNet Tile Resample to restore local material detail. Choose upscaler models according to local texture, using smoother models for skin and sharper models for architecture.
Keep denoising low when testing upscaler models, then inspect edges for halos or invented detail. Some upscaler models can exaggerate boundaries, so return to the mask if the repair starts to look artificial.
Use the original image as the conditioning image for this workflow. The ControlNet Tile Resample guide explains why it is often paired with an upscaler. This step restores detail, but it can’t correct a poorly masked edit.
Pick a Model and Workflow That Match the Edit
A general text-to-image checkpoint can inpaint, yet an inpaint-specific checkpoint usually produces cleaner transitions. A Stable Diffusion inpainting workflow preserves source context better than a standard text-to-image pipeline, which may invent surrounding pixels during image generation.
Technical note: diffusion models often use a latent diffusion model for this task. It denoises latent representations, while its unet network predicts each update and the clip text encoder supplies text conditioning.
Configure a Hugging Face Diffusers pipeline
For Python, use hugging face diffusers and load an inpaint-compatible checkpoint with AutoPipelineForInpainting. Pass the source as image, using it as the conditioning image, and pass the binary mask as mask_image.
Confirm that this mask image matches the source dimensions. In the generation call, provide prompt, negative_prompt, strength, and guidance_scale.
The guidance_scale value controls classifier-free guidance, balancing prompt influence against image context. Higher strength allows more of the denoising process to rewrite masked pixels.
Before generation, validate the mask image’s alignment with the intended edit region. If you use automatic1111, check whether prompt weighting is enabled, and consider Kandinsky inpainting when its checkpoint matches your workflow.
Use a fixed seed while testing. That lets you compare one adjustment at a time instead of chasing random differences. The Stable Diffusion inpainting pipeline reference documents this inpaint-compatible pipeline and lists its supported inputs and controls.
If edits follow the prompt too aggressively, lower guidance_scale; excessive classifier-free guidance can overpower local context.
Use task-aware tools for harder repairs
PowerPaint separates text-guided object inpainting from context-aware image inpainting through learned task prompts named Pobj and Pctxt.
In a compact comparison, PowerPaint uses Pobj for text-guided object inpainting when adding or replacing a subject. Pctxt supports context-aware image inpainting when rebuilding a scene after object removal.
The official project page explains how PowerPaint’s learned task prompts and training strategies give the two controls different behavior.
For ordinary object removal, let the mask and surrounding image carry most of the instruction. For a replacement, shape-guided object inpainting helps preserve silhouette and placement while the prompt describes the new subject.
If a repair looks soft, inspect it at native resolution before using upscaler models. Upscaler models can sharpen edges, but they shouldn’t hide a mask or texture mismatch.
Build a Prompt Library You Can Reuse
Save successful edits as reproducible recipes, not isolated lines of text. A useful library records the positive prompt, negative prompt, model, seed, dimensions, denoising strength, guidance scale, mask notes, upscaler models, and a result thumbnail.
Tag each recipe by edit type, such as text-guided object inpainting, context-aware image inpainting, object removal, or image restoration.
Store context with every prompt
When you save prompts or recipe files, keep the source image, mask image, and task prompts with the settings. Record the seed, workflow, output dimensions, and model-specific controls beside them.
For example, note automatic1111, PowerPaint, or Hugging Face Diffusers in the workflow field. Save task prompts when the workflow uses them.
Also record the relevant CLIP text encoder version, classifier-free guidance setting, and documented training strategies. Checkpoint family matters because diffusion models can interpret the same description differently.
Judge prompt packages by their edit data
Judge prompt packages by their edit data, not by prompt length. A reliable object removal recipe includes the source image, mask, seed, settings, and before-and-after result.
Compare source and repaired outputs at native size first. If enlargement matters, test the same upscaler models and save the comparison.
Frequently Asked Questions
What should an inpainting prompt say when removing an object?
Describe the background that should appear after the object is gone rather than repeating details about the unwanted object. Include relevant materials, patterns, lighting, perspective, and depth so the model can continue the surrounding scene.
How much of the image should the mask cover?
Cover the entire object and include a narrow surrounding margin. Include shadows, reflections, and other evidence that belongs to the object, but avoid extending so far that nearby skin, clothing, or architecture is unnecessarily regenerated.
What denoising strength is a good starting point for object removal?
For ordinary object removal, start around 0.35 to 0.55 and adjust based on the complexity of the hidden background. Raise it when the area needs major reconstruction, but expect more variation in texture and edges.
Should I use a negative prompt for object removal?
A targeted negative prompt can discourage remnants such as wheels, text, duplicate objects, or warped brickwork. Keep the list short, because unrelated terms may distract the model from rebuilding the masked area.
How can I make an inpainted repair look native to the image?
Start with a precise mask, a background-focused prompt, and settings that preserve nearby pixels. Inspect the result at native resolution, check for mismatched lighting or hard edges, and only then consider using upscaler models to restore local detail.
Make Each Repair Look Native to the Image
Precise object removal starts with a narrow mask, a background-focused prompt, and settings that protect nearby pixels. When a repair fails, check the mask boundary, background continuity, and settings before rewriting everything.
The strongest inpainting prompts describe the scene that should remain after the unwanted object disappears. This simple principle helps the final object removal look native to the original frame.
Leave a Reply